 The Internet is filled with awesome DIY stuff for pets and I had to make few things for my Frida and Yoda. Why do I like DIY projects? I love DIY projects, they are my favorite anti-stress therapy. I find them perfect for boosting a person’s creativity level. They are also extremely fun and in the end, you will make a product just the way you wanted it to be. I have prepared a few awesome things you can do at your home to make your ferrets happy. I am really extremely excited about this, I wanted to do this for soo long!
Let’s start with the simpler one. The first pack consists of two hidey-hole, one for Frida and one for Yoda! I will make a box for Yoda and a beautiful tent for Frida. To make DIY projects I will need things I can find at home and since I am really not so handy with tools I will use basic tools. Some pliers, paper clips, a measuring tape, a needle, and a thread, and the best tool for every ferret owner – a duck tape. I have tried to find some colorful duck tape, but I have only found one black and silver, basic colors. Oh, well, nevermind, I will find a way to make them extra colorful! Maybe put some green on them, after all, it is my favorite color.
Yoda’s box will be my first project because it is far simpler than Frida’s tent. Since I haven’t done them before, I think it is best to start with the simpler one, don’t you agree?
So, what do I need for Yoda’s hidey-hole?
- A cardboard box
- Some duck tape
- Scissors
- Old shirt
- A craft knife
- A needle and a thread
I like this project because it is extremely simple and it is done in under 10 minutes. If you are a rookie in DIY projects, I think that this is the best project for you. I haven’t done any DIY projects since the rice box so I can say that I am a little out of shape. This one will be perfect for my comeback.
I have chosen a simple cardboard box that doesn’t have one side. It is made from thicker cardboard so my ferrets can stand on it as well. The main entrance is the front side and I will make two smaller entrances on the opposite sides of the box (right in the middle). I will cut two holes sizes: 8cmx8cm (you can make a smaller or bigger hole, it is up to you). I will tell you later why I added two more holes.
When people make this box for cats, they just put the box in the old T-shirt. I will use a long sleeve shirt so my ferrets can enter the box from the front and from the sides. I want to make two „tunnels“ on each side of the box so they can enter from the tunnels. It is far more fun that way if you ask ferrets.
Now that I have made two holes I will put the box in the long sleeve shirt and place the holes for the neck and arms right on the holes in the box. If you aren’t sure where to put the holes for the sleeves, put the box on the shirt first, then cut the holes for the sleeves. Anyhow, works just fine.
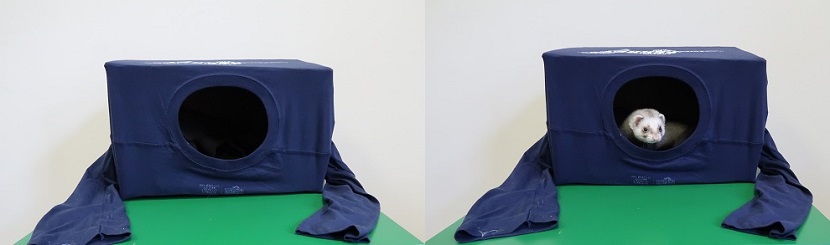
The final step is to fix the box to the shirt. I will use a needle and a thread to fix the holes on the side of the box to the sleeves. Otherwise, your ferret will go in that area between the box and the shirt and that is something we want to avoid. After that, tie up the rest of the shirt in a knot at the back of the box, and Voila! You have an awesome box for your ferret!
Spring is coming so put light material inside the box, maybe some old shirts or light blankets, and your ferret will have a soft hidey-hole in under 10 minutes!
Yoda will be so excited!
It is Frida time!
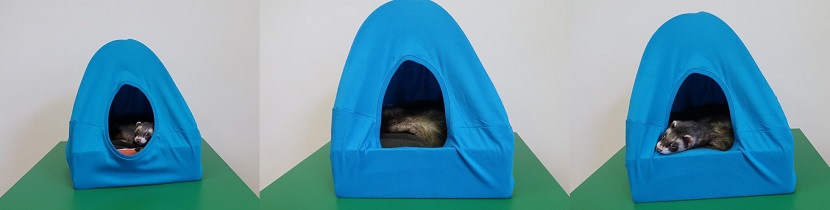
For Frida, I decided to make the most famous cat tent, but for ferrets. Ferrets are smaller than cats, so this tent will be pocket-size. I have decided to go with a base of about 20cm x 20cm. Oh, I almost forgot, before I continue with my project, I have to list things I need for the tent:
- A cardboard base 20×20 cm
- A duck tape
- One hanger
- Pliers
- Tshirt
- Safety pins
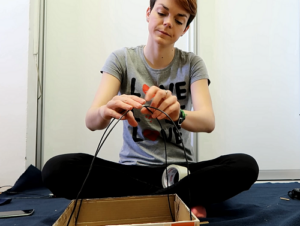
The first thing I have to do is to get a hanger. The best hanger to use is the wired one because I can easily cut it. The first step is to cut the „head“ of the hanger and straighten the wired hanger. Repeat that with the second hanger. Excellent, that will be the tent!
The next step is to fix the wire on the cardboard base. I have to pierce the cardboard with the wire and curve the wire on the opposite side of the cardboard. Repeat that on the other 3 corners. Since I have two wires I have to connect two opposite (diagonal) corners with one wire to make a tent. So, the result is four corners connected with two wires. After that, I just have to fix the joint (where two wires meet) with the duck tape. Woohoo, the tent is almost done!
My final step is to put the tent in the T-shirt (just like with Yoda’s box) and tie up the T-shirt. Here I will use safety pins to fix the knots!
I hope you liked my little ferret projects. Share with me and the rest of the ferret world your projects!